Introduction
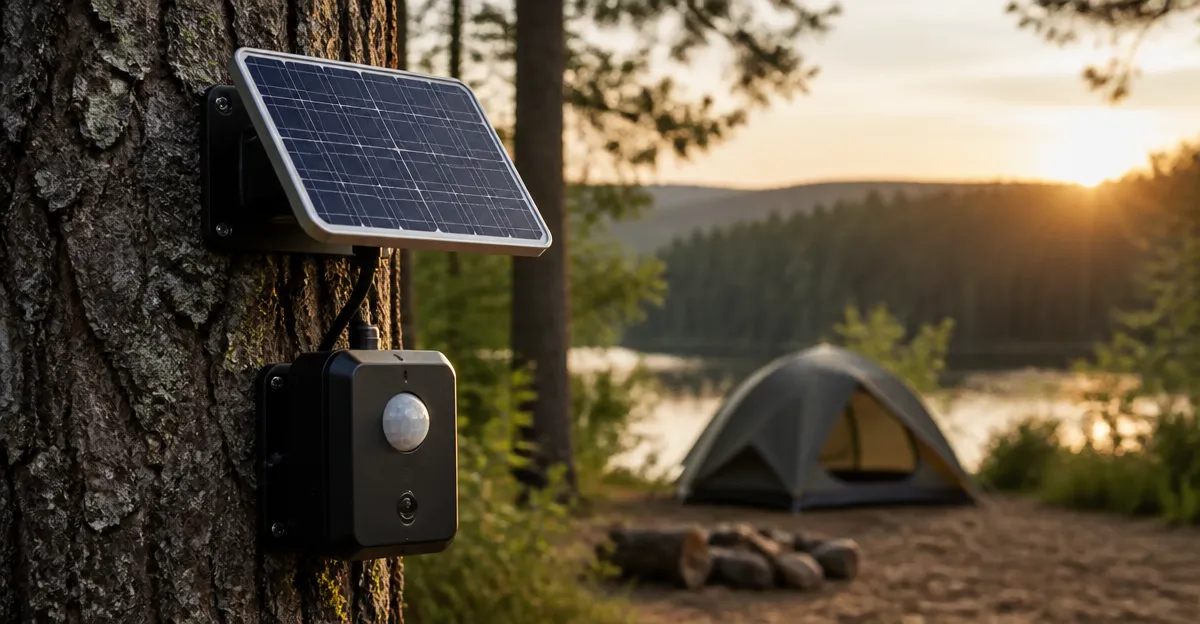
One will discover how to protect valuable camping equipment by constructing a low‑power solar panel theft sensor. This guide explains the underlying principles of solar energy, motion detection, and alarm signaling. The reader will acquire practical skills that can be applied to any outdoor setting where power is limited. By the end of the article, one will be able to assemble, test, and deploy a reliable sensor that operates without batteries.
What You’ll Need
- Small solar panel (5‑10 W, weather‑proof)
- Lithium‑ion or Li‑Po rechargeable battery (2 Ah)
- Microcontroller board (Arduino Nano or similar)
- PIR motion sensor module
- Low‑power buzzer or radio transmitter
- Enclosure rated for outdoor use
- Wiring, connectors, and heat‑shrink tubing
- Basic hand tools (screwdriver, wire‑cutter, soldering iron)
For deeper understanding of solar power fundamentals, the book DIY Solar Power provides clear explanations of panel sizing and charge‑controller selection. The guide DIY Solar Power for Beginners offers a technical reference for wiring and system maintenance. Finally, Off‑Grid Survival Projects for Beginners supplies context on self‑sufficiency and power budgeting in remote environments.
Step 1: Design the Power Budget
One should begin by estimating the sensor’s daily energy consumption. A typical PIR sensor draws 0.1 mA in standby and 30 mA when motion is detected for a few seconds; a low‑power buzzer adds roughly 20 mA for brief alerts. Assuming an average of 5 minutes of active detection per day, the total draw is approximately 0.5 Wh. Selecting a 5 W solar panel ensures sufficient charge even on overcast days, while a 2 Ah battery stores enough energy for several cloudy periods.
The book DIY Solar Power (price $14.99, rating 4.8/5 from 188 reviews) explains how to calculate panel output based on latitude and seasonal sun hours. Using its formulas, one can confirm that a 5 W panel will generate roughly 30 Wh per day in moderate climates, far exceeding the sensor’s needs.
Why this matters: an undersized panel would lead to frequent battery depletion, rendering the alarm inoperative when it is most needed. Conversely, an oversized panel adds unnecessary cost and weight.
Step 2: Assemble the Solar Charging Circuit
One must connect the solar panel to a charge controller before linking it to the battery. A simple MPPT (Maximum Power Point Tracking) controller improves efficiency by up to 30 % compared with linear regulators. Connect the panel’s positive and negative leads to the controller’s input terminals, then connect the controller’s battery output to the rechargeable cell, observing polarity.
The guide DIY Solar Power for Beginners (price $6.48, rating 4.4/5 from 392 reviews) includes wiring diagrams for MPPT modules and explains how to protect the battery from over‑charging. Following its instructions reduces the risk of battery swelling, which could compromise the sensor’s enclosure.
Secure all connections with heat‑shrink tubing to prevent moisture ingress. Place the controller inside the waterproof enclosure alongside the microcontroller board, leaving a small vent for pressure equalization.
Step 3: Program the Microcontroller
One should write a concise sketch that reads the PIR sensor, activates the alarm, and puts the microcontroller into sleep mode when idle. The Arduino Nano can enter a low‑power sleep state consuming less than 0.02 mA, extending battery life dramatically.
The book Off‑Grid Survival Projects for Beginners (price $14.99, rating 4.8/5 from 188 reviews) contains a chapter on low‑power programming techniques for off‑grid devices. Applying those techniques ensures that the sensor remains operational for months without maintenance.
Upload the code via USB, then test the sensor’s response by waving a hand in front of the PIR module. Verify that the buzzer sounds briefly and that the microcontroller returns to sleep within two seconds.
Step 4: Integrate the Motion Detection and Alarm
One must mount the PIR sensor on the exterior of the enclosure, angled downward to cover the campsite’s perimeter. Use a small bracket or zip‑tie to secure the sensor while allowing a clear field of view of at least 90 degrees.
Connect the sensor’s VCC and GND to the microcontroller’s power pins, and route the signal line to a digital input. The alarm can be a piezo buzzer or a low‑power RF transmitter that alerts a handheld receiver. The choice depends on whether audible or silent alerts are preferred.
Why the PIR sensor is essential: it detects infrared radiation changes caused by human movement, providing a reliable trigger without the need for cameras or complex image processing. This keeps the system inexpensive and power‑efficient.
Step 5: Test, Calibrate, and Harden the Enclosure
One should perform a full‑day test under varying light conditions. Verify that the solar panel recharges the battery after each night and that the sensor continues to respond to motion. Adjust the PIR sensor’s sensitivity potentiometer if false alarms occur due to wildlife.
Seal the enclosure with silicone gasket tape to achieve an IP65 rating, protecting the electronics from rain and dust. Drill a small vent with a breathable membrane to allow pressure equalization while preventing water ingress.
Record the battery voltage at sunrise and sunset for several days. If the voltage drops below 3.3 V, consider adding a larger battery or a higher‑capacity panel.
Tips & Pro Tips
- Mount the solar panel on a pole angled 30° toward the equator for optimal year‑round exposure.
- Use a voltage‑divider circuit to monitor battery health and trigger a low‑battery warning on a handheld display.
- Apply a matte black coating to the enclosure to reduce glare and improve heat dissipation.
- Consider adding a tamper‑switch that disables the alarm if the enclosure is opened without authorization.
Troubleshooting
Problem: Sensor does not trigger alarm.
Solution: Verify that the PIR sensor receives power and that the signal pin is correctly connected to the microcontroller. Check the code for proper pin assignment and ensure the microcontroller is not stuck in sleep mode due to a missing wake‑up interrupt.
Problem: Battery does not charge.
Solution: Confirm panel polarity, inspect the charge controller’s LED indicators, and test the panel voltage with a multimeter under sunlight. Replace the controller if it shows no output.
Conclusion
One has now learned how to design, build, and deploy a low‑power solar panel theft sensor for campsites. The project combines renewable energy, motion detection, and microcontroller programming to create a self‑sustaining security device. By following the steps outlined, one can protect valuable gear without relying on disposable batteries or complex infrastructure. Continued experimentation with panel size, sensor placement, and alarm type will further refine the system for specific camping environments.
Products Mentioned in This Guide
Frequently Asked Questions
How large should the solar panel be for a low‑power campsite theft sensor?
A 5‑10 W weather‑proof panel provides enough energy to keep a 2 Ah Li‑ion battery charged for continuous operation.
What type of battery works best with the solar‑charged sensor?
A 2 Ah lithium‑ion or Li‑Po rechargeable cell offers high energy density and tolerates the intermittent charging cycles of a small solar panel.
Which microcontroller is recommended for this project?
An Arduino Nano or similar low‑power board handles the PIR input and alarm output while consuming minimal current.
How far can the PIR motion sensor detect movement around a campsite?
Typical PIR modules detect motion up to 5‑7 m; mounting it on a pole extends coverage to the surrounding tent area.
What steps ensure the enclosure remains weather‑proof?
Seal all seams with silicone gasket, use UV‑stable housing, and apply heat‑shrink tubing on all exposed connections.