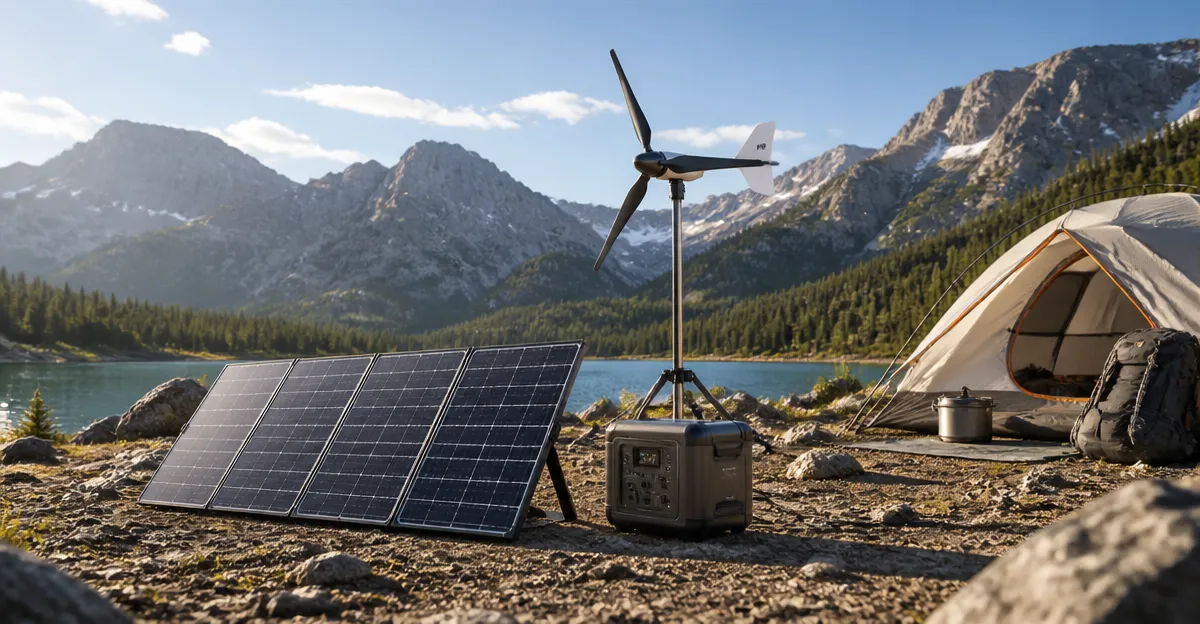
How to Set Up a Hybrid Solar and Micro Wind Kit for Remote Camping: Step‑by‑Step Off‑Grid Power Guide
Introduction
Remote camping offers freedom, but it also demands reliable electricity for lighting, communication, and small appliances. This guide teaches readers how to design and install a hybrid solar‑micro wind system that delivers consistent power even when the sun is hidden behind clouds. By following each step, one will understand the rationale behind component selection, how to assemble the system safely, and how to maintain it for seasons of use.
The instructions are written for campers with basic mechanical ability; no professional electrician is required. Nevertheless, the guide references high‑quality tools and kits that simplify the process, ensuring that the system operates efficiently and safely.
Readers will learn to assess energy demand, choose appropriate solar panels, integrate a micro wind turbine, install battery storage, and wire the components together. Practical tips and troubleshooting advice are included to help avoid common pitfalls.
What You’ll Need
- Solar panel kit (e.g., ECO‑WORTHY 200W Solar Panel Kit)
- Micro wind turbine (appropriate for campsite wind speeds; not covered by a specific product)
- Battery bank or lithium storage system (e.g., ECO‑WORTHY 1200W Solar System for larger setups)
- Charge controller (MPPT preferred; included in many kits)
- Inverter (pure sine wave, sized to expected load)
- Cable crimper and connector set (e.g., ECO‑WORTHY Solar Crimper Kit)
- Installation tools (wrenches, drill, mounting brackets)
- Reference guide for system design (e.g., DIY Off‑Grid Solar Power Bible)
Step 1: Assess Your Power Requirements
Begin by listing every device you intend to run at the campsite. Typical items include LED lights, a portable refrigerator, a phone charger, a small laptop, and a satellite communication unit. Estimate the watt‑hour (Wh) consumption for each device by multiplying its power draw (W) by the number of hours of use per day.
For example, a 5 W LED light used for 5 hours consumes 25 Wh, while a 30 W refrigerator operating 12 hours consumes 360 Wh. Summing all items yields the total daily demand. Aim to size the hybrid system to provide at least 20 % more capacity than the calculated total, allowing for cloudy days and wind variability.
Using the DIY Off‑Grid Solar Power Bible as a reference, apply the “Kilowatt Rule” to verify that the chosen panel and turbine ratings meet the demand.
Document the result; this figure will guide the selection of solar panels, wind turbine capacity, and battery storage.
Step 2: Choose and Install Solar Panels
The ECO‑WORTHY 200W Solar Panel Kit provides two 100 W monocrystalline panels, mounting brackets, a 30 A PWM charge controller, and pre‑drilled cabling. Its high‑efficiency cells deliver up to 21.5 % more power than standard panels, making it ideal for limited roof space on a camper or a portable frame.
Installation steps:
- Select a location with unobstructed sunlight for at least four hours per day. The kit’s IP65‑rated junction box protects connections from rain and dust.
- Attach the Z‑mounting brackets to the chosen surface using the supplied bolts. Ensure the brackets are angled between 30° and 45° to maximize seasonal sun exposure.
- Secure the panels to the brackets, tightening all fasteners to prevent wind uplift. The panels are rated to withstand 2400 Pa wind pressure.
- Connect the panels to the 30 A PWM charge controller using the included 16.4 ft 10 AWG solar cables. The controller’s LED indicators confirm proper polarity and charging status.
The kit’s price of $219.99 and rating of 4.6 / 5 from over 1,100 reviewers indicate strong value for a complete, plug‑and‑play solar solution.
If higher output is required, the ECO‑WORTHY 1200W Solar System can be added in parallel, delivering up to 4.68 kWh per day under optimal sunlight.
Step 3: Integrate a Micro Wind Turbine
Wind energy complements solar production, especially during evenings or overcast days. Select a micro turbine rated between 100 W and 300 W that can be mounted on a lightweight pole or tripod. The turbine should include a built‑in MPPT charge controller or be compatible with the existing controller.
Installation guidelines:
- Mount the turbine on a pole at least 10 feet above ground to capture unobstructed airflow.
- Orient the turbine into the prevailing wind direction; many models feature a swivel base for automatic alignment.
- Run the turbine’s output cable to the same charge controller used for the solar panels, ensuring voltage compatibility (12 V or 24 V systems).
- Secure all connections with waterproof connectors; the solar crimper kit will be useful for this purpose (see Step 4).
By combining solar and wind, the system can maintain a more constant charge rate, reducing reliance on the battery bank.
Step 4: Install Battery Storage and Connectors
Battery capacity must match the daily demand calculated in Step 1. For a modest campsite requiring up to 800 Wh per day, a 12 V 100 Ah lithium‑ion battery provides 1,200 Wh of usable energy, leaving a comfortable safety margin.
The ECO‑WORTHY 1200W Solar System includes a dual‑pack 12.8 V 280 Ah Li‑ion battery bank with a built‑in Battery Management System (BMS). Its 99 % MPPT efficiency and 95 % inverter conversion efficiency ensure minimal energy loss.
To attach solar and wind cables to the battery terminals, use the ECO‑WORTHY Solar Crimper Kit. The kit provides high‑carbon steel crimping jaws, ten pairs of PPO connectors, and two spanner wrenches. Crimping creates a secure, low‑resistance connection that will not loosen under vibration.
Procedure:
- Strip the ends of each cable to expose 10 mm of conductor.
- Select the appropriate connector size from the kit’s assortment.
- Insert the stripped wire into the connector barrel, then place the assembly into the crimper.
- Apply firm, even pressure until the jaws close completely. The crimper’s ergonomic handle reduces hand fatigue.
- Verify the connection by pulling gently on the wire; a properly crimped joint will not separate.
All connections should be double‑checked for correct polarity before finalizing the wiring.
Step 5: Wire the System and Add an Inverter
With panels, turbine, and batteries in place, the next step is to interconnect them. Use appropriately gauged solar cable (minimum 10 AWG for currents up to 30 A) to minimize voltage drop.
Wiring sequence:
- Connect the solar panel array and wind turbine to the charge controller’s input terminals. The controller will automatically manage the combined input.
- Run a cable from the charge controller’s output to the battery bank, using the crimped connectors prepared in Step 4.
- Install a fuse or circuit breaker (minimum 30 A) on the positive line between the controller and the battery to protect against short circuits.
- Attach the inverter’s DC input to the battery bank, again employing crimped connectors and a protective fuse.
- Connect AC loads to the inverter’s output sockets. For sensitive electronics, consider a surge‑protected power strip.
The inverter supplied with the ECO‑WORTHY 1200W Solar System is a pure sine wave model, which safely powers laptops, LED lighting, and small appliances without generating harmonic distortion.
After wiring, turn on the charge controller, then the inverter. Monitor the controller’s LCD display for voltage, current, and state‑of‑charge readings. The system should begin charging the battery while simultaneously supplying power to connected loads.
Step 6: Test, Optimize, and Secure the Installation
Before relying on the system for an extended trip, perform a full day‑long test. Record the battery’s state‑of‑charge at sunrise, midday, and sunset. Verify that the inverter can handle the peak load of all devices running simultaneously.
If the battery does not reach the expected charge level, check for shading on the panels, loose connections, or insufficient wind speed. Adjust panel tilt or reposition the turbine as needed.
Secure all cables with zip ties and protect exposed wiring with conduit or heat‑shrink tubing. Store the crimper kit and spare connectors in a waterproof container for future maintenance.
Finally, document the system layout, component serial numbers, and warranty information. This record will simplify troubleshooting and warranty claims.
Tips & Pro Tips
- Use a multimeter to verify voltage polarity before crimping; reverse polarity can damage the charge controller.
- Mount solar panels on a swivel bracket to adjust tilt seasonally without dismantling the array.
- Consider adding a small wind‑direction sensor to orient the turbine automatically for maximum output.
- When expanding the system, keep all components within the same voltage family (12 V or 24 V) to avoid complex converters.
- Regularly clean panel surfaces; dust and bird droppings can reduce efficiency by up to 15 %.
Troubleshooting
| Problem | Possible Cause | Solution |
|---|---|---|
| No charge detected | Loose connector or reversed polarity | Inspect all crimped joints, verify polarity with a multimeter, re‑crimp if necessary. |
| Inverter shuts down under load | Battery voltage too low or inverter overloaded | Reduce simultaneous load, ensure battery capacity matches demand, check fuse rating. |
| Wind turbine produces no power | Incorrect wiring or turbine not rotating | Confirm turbine is free to spin, verify cable connections to charge controller, check for wind speed. |
| Excessive heat at controller | Poor ventilation or over‑current | Install the controller in a shaded area, ensure fuse size matches specifications. |
Conclusion
By following this guide, one can assemble a reliable hybrid solar‑micro wind power system that delivers off‑grid electricity for remote camping adventures. The process begins with a clear understanding of energy needs, proceeds through the selection of efficient panels and a sturdy wind turbine, incorporates safe battery storage, and finishes with careful wiring using the ECO‑WORTHY Solar Crimper Kit to ensure durable connections.
With the system tested and optimized, campers gain energy independence, reduce reliance on noisy generators, and enjoy the quiet comfort of renewable power. The recommended products provide a balance of affordability and performance, but the principles outlined apply to any comparable equipment.
Embark on your next wilderness expedition with confidence, knowing that a well‑designed hybrid system will keep lights on, devices charged, and memories bright.
Products Mentioned in This Guide
Frequently Asked Questions
What are the main advantages of using a hybrid solar‑micro wind system for remote camping?
It provides continuous power by combining sunlight and wind, reducing reliance on a single energy source and extending battery life.
How do I calculate the energy demand for my camping setup?
List all devices, note their wattage and usage hours, then sum the daily watt‑hours to size panels, turbine, and batteries accordingly.
Can I install the hybrid kit without a licensed electrician?
Yes, the kits are designed for DIY assembly with basic tools; just follow the wiring diagram and safety guidelines.
What type of battery is best for storing power in a hybrid camping system?
Lithium‑iron‑phosphate (LiFePO4) batteries are lightweight, have high cycle life, and handle both solar and wind charging efficiently.
How often should I maintain the solar panels and micro wind turbine while camping?
Inspect panels for debris and clean them weekly; check the turbine’s blades and bearings monthly, and verify connections before each trip.