How to Size and Mount a DC-to-DC Charger in Your RV: Step‑by‑Step Guide for Proper Sizing, Placement, and Safe Installation
Introduction
Modern RVers rely on a stable house‑battery bank to power lights, appliances, and communication gear while on the road. A DC‑to‑DC charger converts alternator output into a controlled charge for that bank, protecting both the starter battery and the auxiliary cells. This guide explains how to determine the correct charger size, choose a suitable mounting location, and complete a safe installation. By following each step, one can avoid common mistakes such as undersized chargers, overheating, or damaging the vehicle’s electrical system.
What You’ll Need
- DC‑to‑DC charger (see product recommendations below)
- Appropriate gauge wire (typically 8‑10 AWG for 30‑50 A applications)
- Inline fuse or circuit breaker rated for charger input
- Ring terminals, heat‑shrink tubing, and crimping tool
- Mounting hardware – stainless‑steel brackets or vibration‑resistant screws
- Multimeter and Bluetooth‑enabled smartphone or tablet
- Basic hand tools (drill, screwdriver set, wire stripper)
Step 1: Determine Your Power Requirements
The first task is to calculate the maximum current your house‑battery bank will draw from the alternator. Multiply the desired charging power (in watts) by a safety factor of 1.2 to accommodate inefficiencies and temperature rise. For example, a 12 V, 100 Ah lithium pack typically requires 50 A of continuous charge for rapid replenishment, which equals 600 W. Applying the safety factor yields 720 W, suggesting a charger rated at least 700 W.
Consider the type of alternator in your vehicle. Modern smart alternators can limit current to protect the engine; a charger with configurable input limits, such as the Victron Orion-XS 12/12V 50A Charger, allows precise adjustment to stay within manufacturer specifications.
Also account for additional loads such as inverters, water pumps, or HVAC units that may draw from the house bank while the engine runs. Summing these loads helps verify that the selected charger can meet peak demand without overtaxing the alternator.
Step 2: Choose the Appropriate Charger
Based on the power calculation, select a charger that meets or exceeds the required wattage while offering the features you need. Below are three common scenarios:
- High‑Current, Multi‑Battery Systems – If you run a large lithium bank (200 Ah or more) and require fast charging, the Victron Orion-XS 12/12V 50A Charger provides 700 W at 98.5 % efficiency, Bluetooth configuration, and SafetyShield+ protection. It is priced at $288.71 and holds a 4.7‑star rating from 519 reviews.
- Budget‑Friendly, Moderate Loads – For a typical 100 Ah AGM or lithium pack, the Renogy 12V 20A DC‑DC Battery Charger delivers 240 W with 94 % efficiency. At $140.99 and a 4‑star rating (42 reviews), it offers built‑in alternator detection and optional Bluetooth via the separate BT‑2 module.
- Compact, Versatile Option – The Victron Orion‑Tr 12/12V 30A Charger supplies 360 W, supports both lead‑acid and lithium chemistries, and can be paralleled for higher output. It costs $172.05 and enjoys a 4.6‑star rating from 946 reviewers.
Each of these chargers includes built‑in Bluetooth, allowing real‑time monitoring and configuration through the VictronConnect or Renogy app. Selecting a charger with this capability simplifies troubleshooting and ensures the system operates within safe parameters.
Step 3: Plan Wiring and Fuse Protection
Proper wire sizing prevents voltage drop and overheating. Use the American Wire Gauge (AWG) chart: for 30 A, 10 AWG copper is adequate; for 50 A, upgrade to 8 AWG. Run the input cable from the alternator or starter battery to the charger, and the output cable from the charger to the house‑battery bank.
Install an inline fuse or circuit breaker on the input side, sized 125 % of the charger’s maximum input current. For the Orion‑XS (50 A), a 60 A ANL fuse is appropriate. This protects the vehicle wiring in the event of a short circuit.
Terminate all connections with high‑quality ring terminals, crimp them securely, and seal with heat‑shrink tubing to guard against moisture – a critical consideration for the IP65‑rated Orion‑XS, which is designed for harsh environments.
Step 4: Select a Mounting Location
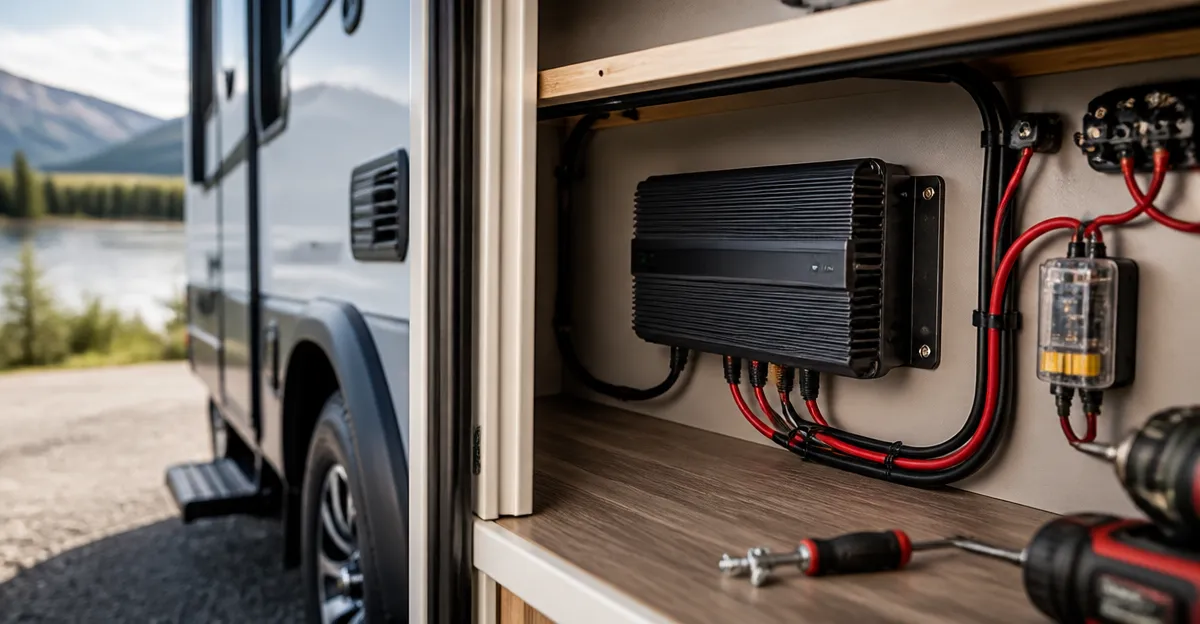
The charger should be mounted in a dry, well‑ventilated area that remains accessible for future firmware updates. Common locations include the interior of a cabinet, under a seat, or within a dedicated electronics bay. Ensure the chosen spot provides at least 2 inches of clearance on all sides for heat dissipation.
For the Orion‑XS, the compact IP65 enclosure allows installation behind a panel without compromising water resistance. The Victron Orion‑XS 12/12V 50A Charger weighs less than 2 kg, making it easy to secure with stainless‑steel brackets.
When mounting near metal surfaces, use vibration‑dampening washers to reduce stress on the terminals. Verify that the mounting hardware does not interfere with the charger’s Bluetooth antenna, as metal shielding can reduce signal strength.
Step 5: Install the Charger
Follow these actions in order:
- Disconnect the vehicle’s negative battery terminal to avoid accidental shorts.
- Secure the charger to the chosen location using the supplied mounting holes and stainless‑steel screws.
- Connect the input leads: attach the positive wire to the alternator’s charging output (or starter battery positive) and the negative wire to chassis ground.
- Install the inline fuse on the positive input line, then route the output leads to the house‑battery positive terminal, again using appropriate ring terminals.
- Reconnect the vehicle’s negative terminal and verify that all connections are tight.
During installation, refer to the charger’s wiring diagram. The Orion‑Tr Isolated model (Victron Orion‑Tr Isolated 12/12V 30A) includes an isolation transformer that protects the starter battery from back‑feeding, which can be advantageous on boats or marine‑type RVs.
Step 6: Configure via Bluetooth and App
Power up the system and launch the VictronConnect or Renogy Home app on a smartphone. Pair with the charger by selecting the Bluetooth device name (e.g., "Orion‑XS"). The app will display real‑time voltage, current, and temperature data.
Adjust the input current limit to match the alternator’s maximum safe output. For a 150 A alternator, setting the Orion‑XS to 45 A provides a comfortable margin while still delivering rapid charge rates.
Save the configuration and enable any optional features such as engine‑running detection or LiFePO4 activation, depending on the battery chemistry. The app also logs performance history, which is useful for future diagnostics.
Step 7: Verify Performance and Safety
With the engine running, measure the charger’s output using a multimeter. The voltage should settle around 14.4 V for lithium batteries and 13.8 V for AGM. Confirm that the current does not exceed the configured limit and that the charger remains below its maximum temperature rating (typically 60 °C for Victron units).
Inspect the wiring after the first hour of operation for any signs of overheating, such as discoloration or a melted sheath. If the charger includes a built‑in temperature sensor, the app will alert you if temperatures approach unsafe levels.
Finally, test the system under load by turning on a small inverter or water pump. Observe that the house‑battery voltage remains stable, indicating the charger is adequately supporting the load.
Tips & Pro Tips
- Use oversized wire. A 2‑size larger gauge reduces voltage drop, especially on long runs (over 15 ft).
- Ventilation matters. Install a small 12 V fan in the enclosure if the charger operates near its maximum rating for extended periods.
- Fuse both sides. Adding a fuse on the output side protects the house battery from a shorted charger.
- Document wiring. Take photos of the final connections; this speeds up future troubleshooting.
- Consider isolation. For marine‑type RVs, the isolated version of the Orion‑Tr prevents back‑feeding, enhancing safety.
Troubleshooting
| Problem | Possible Cause | Solution |
|---|---|---|
| No charging voltage | Input fuse blown or alternator not running | Check fuse continuity, verify engine is on, confirm alternator output with multimeter |
| Excessive heat | Undersized wire or poor ventilation | Upgrade to larger gauge, add fan, ensure at least 2 in clearance |
| Bluetooth not pairing | Interference from metal or distance | Move phone closer, avoid mounting directly behind large metal plates, restart app |
Conclusion
Properly sizing, mounting, and installing a DC‑to‑DC charger transforms an RV’s electrical system from a fragile setup into a reliable power hub. By calculating load requirements, selecting a charger such as the Victron Orion‑XS, Renogy 20 A, or Victron Orion‑Tr, and following the wiring and mounting steps outlined above, one can achieve efficient charging, protect the starter battery, and enjoy peace of mind on the road.
Remember to verify configuration with the Bluetooth app, monitor temperature, and use appropriately sized wiring and fuses. With these practices in place, the house‑battery bank will remain healthy for years of adventure.
Products Mentioned in This Guide
Frequently Asked Questions
How do I determine the correct amperage rating for a DC‑to‑DC charger in my RV?
Calculate the total load of your house‑battery appliances and choose a charger that can supply 125‑150% of that current, typically 30‑50 A for most RVs.
What wire gauge should I use for a 40 A DC‑to‑DC charger installation?
Use 8 AWG copper wire for the positive and negative leads to keep voltage drop low and meet safety standards.
Where is the best place to mount a DC‑to‑DC charger in an RV?
Mount it in a dry, ventilated area close to the alternator, using stainless‑steel brackets and vibration‑resistant screws to prevent movement.
Do I need an inline fuse or circuit breaker on the charger’s input side?
Yes, install an inline fuse or breaker rated 1.25 × the charger’s maximum input current to protect wiring and the vehicle’s electrical system.
What are the key steps to ensure a safe DC‑to‑DC charger installation?
Disconnect the vehicle battery, verify polarity, connect wires with ring terminals, secure the charger, double‑check the fuse rating, and test voltage with a multimeter before use.