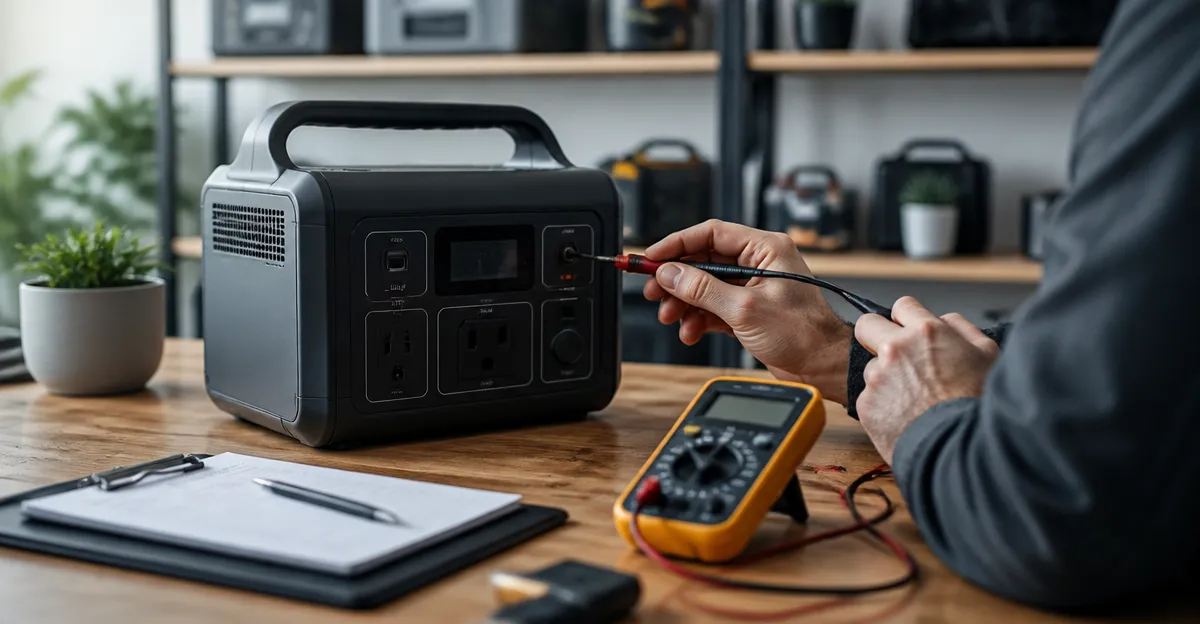
How to Test Used Portable Power Station Battery Health: A Step‑by‑Step DIY Guide
Introduction
One often wonders whether a second‑hand portable power station will deliver reliable performance when it is needed most. This guide explains how to assess the battery health of a used unit, enabling the reader to make an informed purchasing decision. The process combines visual inspection, voltage measurement, load testing, and capacity verification. By following each step, one can identify degradation, estimate remaining runtime, and avoid costly surprises during emergencies or outdoor adventures.
The techniques described are practical, require minimal specialized equipment, and can be performed in a typical garage or workshop. In addition, the guide recommends two highly regarded power stations that serve as reference tools for certain steps. These recommendations are optional; the reader can still complete the test without purchasing them.
Understanding battery health is valuable because a portable power station with a weakened battery may fail to power critical devices such as medical equipment, communication tools, or refrigeration units. Accurate testing protects both safety and financial investment.
Each section below presents clear, actionable instructions, followed by explanations of why particular products are useful for the task at hand.
What You Will Need
- Digital multimeter capable of measuring DC voltage and current.
- Resistive load or a high‑wattage appliance (e.g., electric kettle) to simulate real‑world draw.
- Timer or stopwatch.
- Notebook or spreadsheet for recording measurements.
- Optional: BP3000 Solar Generator – a high‑capacity reference unit for comparative testing.
- Optional: Anker SOLIX C1000 Gen 2 – a compact power station useful for rapid charging and UPS verification.
Step 1: Visual Inspection and Safety Check
The first step is to examine the exterior of the used power station for signs of physical damage, corrosion, or swelling. One should look for cracked casings, loose connectors, or discoloration around the battery compartment. Swelling may indicate internal cell failure, which can be hazardous if the unit is operated under load.
Next, verify that all cables and ports are intact. A damaged AC inlet or USB port can create resistance that skews later measurements. Ensure that the unit is placed on a non‑conductive surface before proceeding.
If the visual inspection reveals any serious defects, it is advisable to discontinue testing and consider the unit unsuitable for further use.
This step requires no additional tools, but it establishes a safe baseline before electrical measurements begin.
Step 2: Measure Open‑Circuit Voltage (OCV)
With the power station turned off and disconnected from any load, use the digital multimeter to measure the open‑circuit voltage across the main battery terminals. This voltage reflects the state of charge and provides an initial indication of battery health.
For lithium‑ion chemistry, a fully charged cell typically reads between 12.6 V and 13.2 V for a 12 V pack, while a severely degraded pack may drop below 10 V. Record the reading and compare it to the manufacturer’s specifications, which can be found in the user manual.
When a reference unit such as the BP3000 Solar Generator is available, measure its OCV under the same conditions. The BP3000 features a 2048 Wh LiFePO₄ battery that maintains a stable voltage curve, making it an excellent benchmark for evaluating other units.
Note that temperature influences voltage; perform the measurement at room temperature (20‑25 °C) for consistency.
Step 3: Perform a Quick Load Test
A load test reveals how the battery behaves under real‑world demand. Connect a resistive load that draws approximately 20 % of the power station’s rated capacity. For a unit rated at 2000 W, a 400 W load is appropriate.
Start the timer and monitor the voltage drop using the multimeter. A healthy battery should maintain voltage within 10 % of the open‑circuit value for the duration of the test. If the voltage falls sharply, the internal resistance is likely elevated, indicating aging cells.
The Anker SOLIX C1000 Gen 2 can serve as a portable load source because it provides up to 2000 W of continuous output through multiple ports. Its 1,024 Wh LiFePO₄ battery delivers stable power, allowing the tester to compare voltage stability between the used unit and the Anker reference.
After five minutes of continuous load, disconnect the load and allow the battery to rest for two minutes before proceeding to the next step.
Step 4: Conduct a Capacity Test Using Discharge Cycle
The most accurate method to assess battery health is to measure the actual energy delivered during a full discharge. Fully charge the power station to 100 % using the supplied charger. For rapid charging, the BP3000 Solar Generator offers 1800 W ultra‑fast charging, reaching 80 % capacity in a short time, which can be useful when testing multiple units.
Once charged, connect a known resistive load that draws a constant current, such as a 500 W heater. Record the start time and monitor the voltage until the unit automatically shuts off at its low‑voltage cutoff (typically around 10 V for LiFePO₄). Calculate the delivered watt‑hours by multiplying the average power by the discharge duration.
Compare the measured watt‑hours to the manufacturer’s rated capacity. A healthy battery retains at least 80 % of its original capacity; for example, the BP3000 is rated at 2048 Wh, so a used unit should deliver no less than 1638 Wh. The Anker SOLIX C1000 Gen 2, with a 1,024 Wh rating, follows the same 80 % rule of thumb.
Document the results in a spreadsheet, noting ambient temperature, load type, and any voltage fluctuations observed during discharge.
Step 5: Verify UPS Switching and Fast‑Charging Functions
Many modern power stations include an uninterruptible power supply (UPS) feature that switches to battery within 10 ms of a mains outage. To test this, connect a sensitive device such as a laptop and simulate a power loss by unplugging the AC input while the unit is operating under load.
The laptop should remain powered without interruption. If the switch‑over exceeds 10 ms, the UPS function may be compromised. Both the BP3000 and the Anker SOLIX C1000 Gen 2 advertise sub‑10 ms switching, making them reliable reference models for this verification.
Additionally, evaluate the fast‑charging capability by using the 1800 W charger of the BP3000 or the 1600 W HyperFlash technology of the Anker model. Charge the test unit from 0 % to 80 % and record the time required. Significant deviation from the advertised charging speed suggests internal protection circuitry may be limiting current due to cell degradation.
Record all observations, as they provide a comprehensive picture of the unit’s overall health.
Tips & Pro Tips
- Always perform testing in a well‑ventilated area to prevent heat buildup.
- Use a temperature‑compensated multimeter for more accurate voltage readings.
- If possible, repeat the capacity test after the battery has rested for at least 30 minutes; this reduces the effect of voltage recovery.
- When comparing results to reference units, ensure that the load type and ambient conditions are identical.
- Document the serial number and purchase date of the used power station; this information aids in warranty verification if needed.
Troubleshooting
Problem: Voltage drops dramatically during the load test.
Solution: Check for loose connections at the output ports. If connections are secure, the battery likely exhibits high internal resistance and should be considered unsuitable for critical use.
Problem: The unit does not shut off at the expected low‑voltage cutoff.
Solution: Verify the firmware version; some manufacturers release updates that correct cutoff thresholds. If the problem persists, the battery management system may be faulty.
Problem: The fast‑charging indicator does not activate.
Solution: Ensure the charger is connected to a circuit capable of delivering the required amperage. Use the BP3000’s fast/slow charging selector switch to match the circuit capacity.
Conclusion
One now possesses a systematic approach to evaluate the battery health of a used portable power station. By completing a visual inspection, measuring open‑circuit voltage, performing load and capacity tests, and verifying UPS and fast‑charging functions, one can determine whether the unit meets the required performance standards. The optional reference products, the BP3000 Solar Generator and the Anker SOLIX C1000 Gen 2, provide reliable benchmarks that enhance the accuracy of the assessment.
Applying these methods before purchase protects the user from unexpected power loss and ensures that critical devices remain operational during emergencies. One is encouraged to document findings and share them with sellers to promote transparency in the secondary market.
Products Mentioned in This Guide
Frequently Asked Questions
How can I quickly check the battery health of a used portable power station?
Perform a visual inspection, measure the open‑circuit voltage, and run a short load test to spot obvious degradation.
What tools do I need for a DIY battery health test?
A multimeter, a known resistive load (or the station’s built‑in load function), and optionally a charger for capacity verification.
How do I verify the remaining capacity of a used power station?
Fully charge the unit, then discharge it under a steady load while timing how long it lasts and compare the result to the manufacturer’s rated runtime.
Is it safe to test a second‑hand power station without a professional?
Yes, as long as you follow safety precautions: wear gloves, avoid short circuits, and never exceed the battery’s recommended voltage or current limits.
Can I use a new power station as a reference when testing an older one?
Using a new model with known specifications helps benchmark voltage and load‑test results, but it isn’t required to complete the assessment.