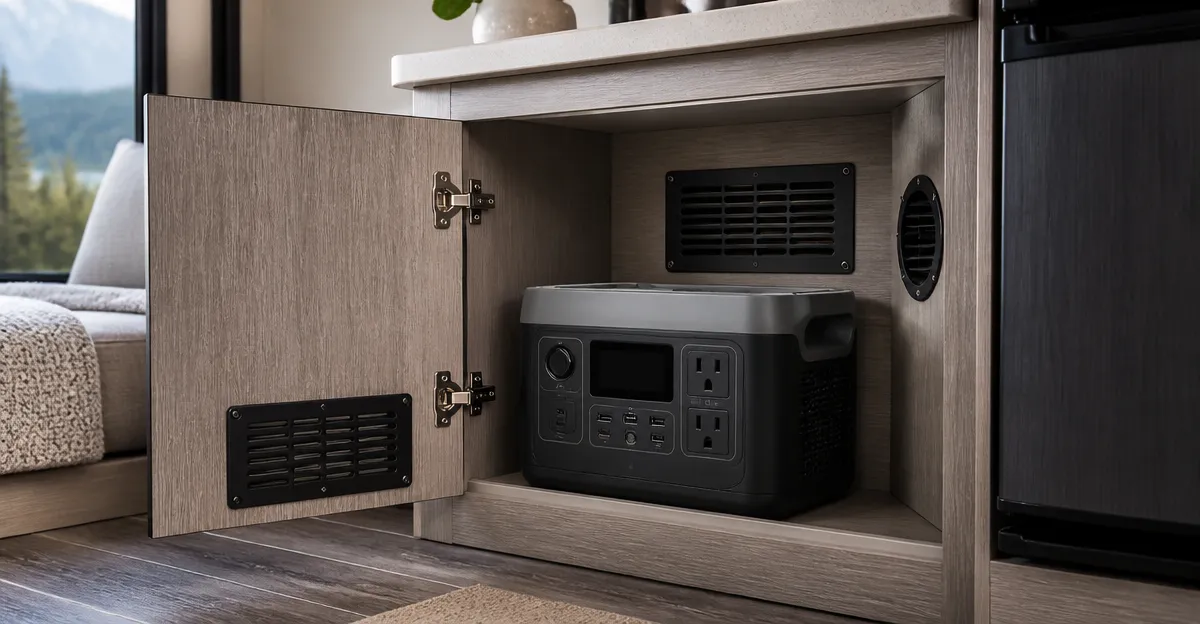
How to Ventilate an RV Cabinet for a Portable Power Station Install: Step‑by‑Step Safety & Cooling Guide
One will discover how to create reliable airflow for a portable power station installed inside an RV cabinet. Proper ventilation prevents overheating, extends battery life, and ensures compliance with safety regulations. This guide provides a structured approach, from assessing space to installing vent components, while recommending proven products. By following each step, one can achieve a professional result without unnecessary expense.
What You’ll Need
- Calvana RV Ceiling Vent Cover – 5‑pack, rotatable louvers, $25.99, 4.4 stars.
- RecPro RV Ceiling Air Vent – single unit, $9.95, 4.4 stars.
- Vent Systems 3" Round Air Vent (2‑Pack) – $15.49, 4.6 stars.
- Camp'N RV Exhaust Vent Cover – $15.47, 4.7 stars.
- Silicone sealant, non‑magnetic screws, a 4‑5/8" hole‑saw, a drill, a screwdriver, a marker, and a safety mask.
Step 1: Assess the Cabinet Space
One should begin by measuring the interior dimensions of the cabinet where the power station will reside. Verify that the cabinet has sufficient clearance for the battery unit and for airflow pathways on all sides. Identify a location on the roof of the cabinet where a vent can be mounted without interfering with existing wiring or structural ribs. Use a marker to outline a 4‑5/8" circular cut‑out if a standard vent will be installed.
Step 2: Choose the Appropriate Vent Type
For a portable power station, an adjustable ceiling vent provides directional control of warm air. The Calvana RV Ceiling Vent Cover offers rotatable slats that can be angled toward the exterior, reducing heat buildup. Its durable plastic construction resists vibration and the random color option (white or light beige) matches most interiors. If budget constraints exist, the RecPro RV Ceiling Air Vent provides a similar 6.5" size at a lower price, though it does not include mounting screws.
When the cabinet design includes only small openings, the Vent Systems 3" Round Air Vent (2‑Pack) can be used as supplemental passive vents. These fixed‑louver vents are ideal for side panels where a low‑profile grille is required. The Camp'N RV Exhaust Vent Cover is suited for exhaust fans but can also serve as a secondary outlet for hot air if the cabinet roof is inaccessible.
Step 3: Prepare the Opening
One must cut the marked circle using a 4‑5/8" hole‑saw attached to a drill. Wear a safety mask to avoid inhaling dust and secure the cabinet to prevent movement. After cutting, smooth the edge with a file to avoid sharp burrs that could damage vent flanges. Test the fit by placing the vent cover into the opening; the vent should sit flush without gaps.
Step 4: Install the Vent Cover
Apply a thin bead of silicone sealant around the perimeter of the opening to create an airtight seal. Insert the Calvana RV Ceiling Vent Cover or the RecPro RV Ceiling Air Vent and press firmly until the sealant spreads evenly. Secure the vent with the supplied screws; if using the RecPro unit, reuse the original screws from the previous vent. Tighten each screw evenly to avoid warping the plastic.
For the 3" round vents, push the vent into the prepared side opening until the friction‑fit engages. If additional holding power is required, a small amount of adhesive may be applied, although the manufacturer does not include glue.
Step 5: Connect the Power Station and Verify Airflow
Place the portable power station inside the cabinet, ensuring that its intake and exhaust ports are not obstructed. Adjust the rotatable slats on the Calvana vent to direct warm air outward while allowing cooler air to enter through any supplemental vents. Turn on the power station and monitor temperature for ten minutes using an infrared thermometer. The temperature should remain within the manufacturer’s recommended operating range, typically below 120°F for lithium‑ion batteries.
Step 6: Seal and Finish
After confirming adequate cooling, apply a final bead of silicone around the vent flange to protect against moisture ingress. Wipe away excess sealant with a damp cloth before it cures. Reinstall any interior panels that were removed during the process, and ensure that all wiring remains clear of the vent opening.
Tips & Pro Tips
- Use a non‑magnetic screwdriver when working near electronic components to avoid accidental short circuits.
- Install a small temperature sensor inside the cabinet to provide real‑time feedback during long trips.
- Consider adding a low‑profile vent on the opposite side of the cabinet to create cross‑ventilation, which improves heat dissipation.
- When using the Vent Systems 3" Round Air Vent, orient the fixed louvers upward to encourage natural convection.
- Periodically inspect the silicone seal for cracks, especially after exposure to extreme temperature cycles.
Troubleshooting
Problem: The power station continues to overheat despite vent installation.
Solution: Verify that the vent slats are angled outward, check for any blockage in the supplemental vents, and ensure that the silicone seal has not sealed the vent too tightly, restricting airflow.
Problem: Air leaks are detected around the vent flange.
Solution: Remove the vent, apply fresh silicone sealant, and reinstall, making sure the sealant forms a continuous bead without gaps.
Conclusion
One has now learned how to assess, select, and install appropriate ventilation for an RV cabinet housing a portable power station. Proper airflow protects battery health, enhances safety, and prolongs the lifespan of the electrical system. By following the steps and employing the recommended products, one can achieve a reliable and professional installation without unnecessary complexity.
Products Mentioned in This Guide
Frequently Asked Questions
Why is proper ventilation essential for a portable power station inside an RV cabinet?
It prevents overheating, protects battery life, and ensures the installation meets safety regulations.
What type of vent is recommended for a small RV cabinet space?
A 3" round air vent or rotatable louvers like the Calvana RV Ceiling Vent Cover provide efficient airflow in tight areas.
How do I determine the correct vent size for my power station?
Calculate the power station’s BTU output and use the vent manufacturer’s airflow rating to match or exceed that requirement.
Can I install a vent without drilling new holes in the cabinet?
Yes, many vent covers snap into existing ceiling openings or use adhesive flanges for a no‑drill installation.
What safety steps should I follow when installing the vent?
Disconnect the power source, verify the vent is securely sealed, and test airflow with a smoke stick or fan before re‑energizing the system.