Introduction
In this guide the reader will discover how to design, assemble, and integrate a solar battery bank with a portable power station. The process enables reliable off‑grid electricity for camping, emergency preparedness, or remote work. By following each step the reader will gain confidence in handling electrical components safely. The guide also highlights three market‑tested products that simplify the build while maintaining cost‑effectiveness.
What You’ll Need
- Portable power station (see product recommendations below)
- Foldable solar panel(s) compatible with the chosen station
- Deep‑cycle battery bank or lithium modules
- Charge controller with MPPT capability
- Appropriate wiring, connectors, and safety fuses
- Tools: multimeter, wire stripper, screwdriver set, and heat‑shrink tubing
Step 1: Determine Power Requirements
Begin by listing every device that will be powered during the intended use case. Calculate the total watt‑hour demand by multiplying each device’s wattage by the expected hours of operation. For example, a 50 W LED lantern used for eight hours consumes 400 Wh, while a laptop drawing 65 W for four hours adds 260 Wh. Summing these values provides a target capacity that guides battery selection and informs the size of the portable power station.
When the calculated demand falls between 300 Wh and 600 Wh, the ZeroKor 300W Solar Generator offers a balanced solution. It features a 280 Wh battery, two 300 W AC outlets, and a 60 W foldable solar panel, making it suitable for moderate loads such as phones, tablets, and small fans. Priced at $188.97 with a 4.3‑star rating, it provides built‑in MPPT technology that maximizes solar conversion efficiency up to 20.5 %.
If the project demands higher continuous output or longer runtime, the Jackery Explorer 300 delivers 293 Wh of lithium‑ion capacity and two pure sine wave AC outlets rated at 300 W. Its rapid 80 % recharge in two hours via wall outlet or 60 W PD USB‑C port reduces downtime. At $188.99 and a 4.6‑star rating, it also supports optional solar panels for expanded autonomy.
For ultra‑lightweight applications where airline‑compatible capacity is essential, the Tenlike Portable Power Station provides 99.9 Wh, a 60 W Type‑C PD port, and an AC outlet up to 120 W. Weighing only 1.65 lb and priced at $59.99, it is ideal for short trips or as a backup for essential electronics. Its 4.4‑star rating reflects strong user satisfaction.
Step 2: Select and Connect Solar Panels
Choose solar panels that match the input voltage range of the portable station and the charge controller. The ZeroKor unit includes a 60 W monocrystalline panel, which pairs directly with its built‑in MPPT controller. This eliminates the need for an external controller and simplifies wiring. For the Jackery Explorer 300, the optional Jackery SolarSaga 100 (not included) is recommended; it supplies up to 100 W and works efficiently with the station’s MPPT algorithm.
When using the Tenlike station, any 60 W USB‑C PD solar panel can feed the built‑in fast‑charging port. Ensure the panel’s open‑circuit voltage does not exceed the device’s maximum input (typically 23 V for these stations). Secure the panels on a foldable rack or attach them to a backpack using the provided straps to maintain optimal sun exposure.
Connect the panel to the power station using the appropriate cable (MC4 to barrel or USB‑C, depending on the model). Verify polarity before tightening connectors, as reverse polarity can damage the internal battery management system. Once connected, monitor the charge indicator on the station to confirm that the MPPT controller is actively converting solar energy.
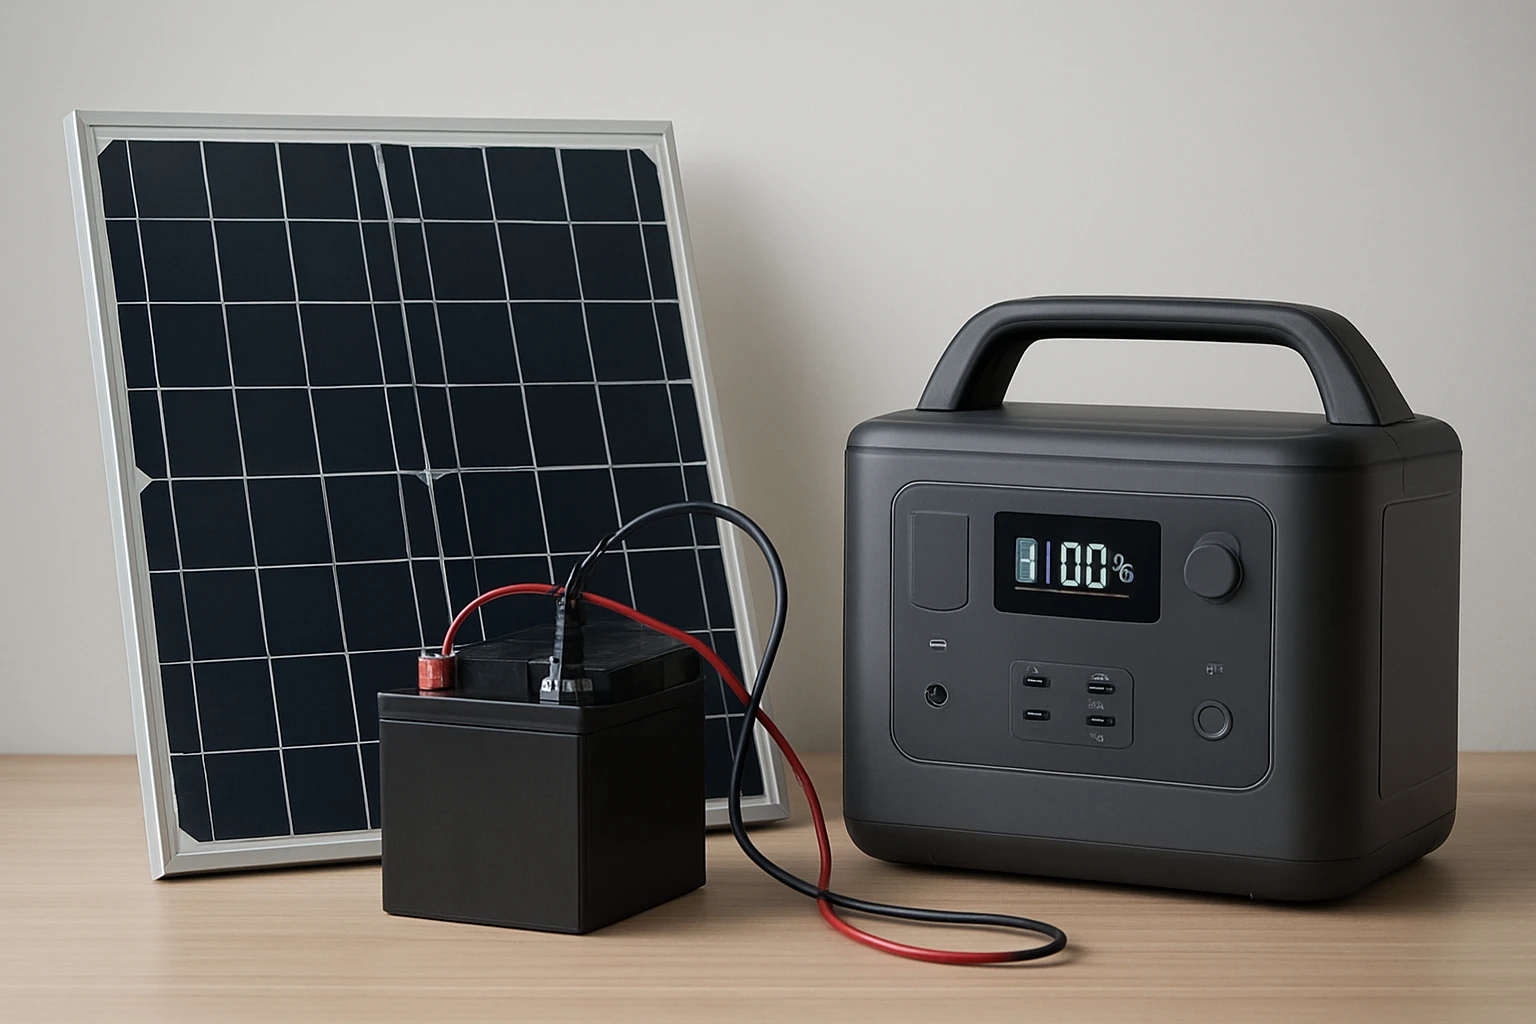
Step 3: Assemble the Battery Bank
If the chosen portable station does not meet the required capacity, augment it with external deep‑cycle batteries wired in parallel. Use lithium‑iron‑phosphate (LiFePO4) modules for safety, long cycle life, and stable voltage. For a target of 800 Wh, two 400 Wh LiFePO4 batteries in parallel will provide the needed storage while keeping the system balanced.
Integrate the external bank through the station’s DC input port, which typically accepts 12‑24 V. Install a high‑current fuse (e.g., 30 A) close to the battery terminals to protect against short circuits. Route the cables through a waterproof conduit if the installation will be exposed to the elements.
After wiring, use a multimeter to confirm that the voltage at the DC input matches the expected range (e.g., 13.6 V for a 12 V LiFePO4 bank). Then, power on the station and observe the battery level indicator; a gradual increase confirms successful integration.
Step 4: Configure Output Loads
Plan the distribution of power by assigning each device to the most appropriate outlet. High‑draw appliances such as a small fridge should be connected to the AC outlet, while USB‑C devices benefit from the fast‑charge ports. The ZeroKor generator offers two 300 W AC outlets, one DC port (9‑12.6 V, 10 A max), three 5 V USB ports, and a quick‑charge USB port, providing flexibility for mixed loads.
When using the Jackery Explorer 300, take advantage of its two AC outlets, one 60 W PD USB‑C port, a fast‑charge 3.0 USB‑A port, and a DC car port. This configuration allows simultaneous charging of up to six devices, as highlighted in the product description. The Explorer also includes safety features such as automatic shutdown after 12 hours of low‑power draw, protecting the battery from deep discharge.
The Tenlike station, with its single AC outlet (80 W rated, 120 W max), two 60 W Type‑C PD ports, and additional USB‑C ports, is best suited for lightweight electronics and small appliances. Its built‑in 60 W PD fast‑charging cable reduces the need for separate chargers, streamlining the setup.
Step 5: Test, Optimize, and Secure the System
Before relying on the system in the field, conduct a full charge‑discharge cycle to verify performance. Charge the portable station to 100 % using solar input, then run each connected load for its expected duration while monitoring voltage drop and temperature. Ensure that the internal cooling fan (present in the ZeroKor unit) activates as needed and that no component exceeds its rated temperature.
Record the actual run‑time for each device and compare it to the calculated estimates. If discrepancies appear, adjust the battery bank size or reduce the load accordingly. For long‑term deployments, consider adding a weather‑proof enclosure and mounting the system on a vibration‑damped platform.
Finally, label all cables, secure connectors with zip ties, and store spare fuses in a waterproof bag. This organization simplifies future maintenance and reduces the risk of accidental disconnection during critical moments.
Tips & Pro Tips
- Always use a charge controller with MPPT technology; it can increase solar harvest efficiency by up to 30 % compared with PWM controllers.
- When stacking batteries in parallel, match their capacity and state of charge to avoid imbalance.
- Place solar panels at a 30‑degree tilt toward the sun for optimal exposure during midday.
- Keep the portable station out of direct rain; a simple tarp or waterproof case extends its lifespan.
- Regularly inspect connectors for corrosion, especially in humid environments.
Troubleshooting
Problem: The portable station does not charge from the solar panel.
Solution: Verify that the panel’s voltage is within the station’s input range and that the MPPT controller is active. Check cable polarity and ensure all connectors are tightly seated.
Problem: The AC outlet trips the internal breaker under load.
Solution: Reduce the load to stay below the 300 W limit (ZeroKor and Jackery) or distribute devices across multiple outlets.
Problem: Battery temperature exceeds 45 °C.
Solution: Provide additional ventilation, relocate the unit to a shaded area, or operate with lower simultaneous loads.
Conclusion
This guide has outlined the complete process of building a DIY solar battery bank and integrating it with a portable power station. By assessing power needs, selecting appropriate solar panels, assembling a balanced battery bank, and configuring loads, the reader can achieve reliable off‑grid electricity. The recommended products—ZeroKor 300W Solar Generator, Jackery Explorer 300, and Tenlike Portable Power Station—offer proven performance, safety features, and convenient form factors that accelerate project completion.
With careful testing and adherence to safety best practices, the system will provide dependable power for camping adventures, emergency situations, or remote work. The reader is encouraged to apply these principles, experiment with different configurations, and share results with the broader community.
Products Mentioned in This Guide
Frequently Asked Questions
How do I calculate the total watt‑hour demand for my solar battery bank?
List each device, multiply its wattage by the hours you’ll use it, and sum the results to get the total watt‑hours.
Why should I use an MPPT charge controller instead of a PWM controller?
MPPT controllers convert more solar power into usable charge, increasing efficiency especially with higher voltage panels.
What safety components are essential when wiring a portable solar battery system?
Include appropriate fuses, proper gauge wiring, connectors, and use a multimeter to verify polarity and voltage before powering devices.
Can I combine lithium modules with a deep‑cycle lead‑acid battery bank?
Mixing chemistries is not recommended because they have different charging profiles and can reduce overall system lifespan.
Which portable power station features are most important for off‑grid use?
Look for high wattage output, multiple AC/DC ports, a built‑in MPPT controller, and a battery capacity that matches your calculated watt‑hour needs.