How to Build a Solar-Powered Mesh Network for Disaster Response: Step‑by‑Step Guide to Reliable Emergency Communications
Introduction
In a disaster scenario, reliable communication can mean the difference between safety and danger. This guide teaches the reader how to assemble a self‑sufficient mesh network powered entirely by solar energy. The reader will learn how to evaluate power requirements, deploy portable solar panels, install a Wi‑Fi 7 mesh system, and maintain the network under challenging conditions. By following the procedures, one can create a resilient communications hub that operates even when the grid is down.
The approach combines proven hardware with best‑practice installation techniques. The result is a modular solution that can be scaled for a family shelter, a community relief center, or a mobile response unit. The guide remains useful even if the reader chooses alternative components, because the underlying principles are clearly explained.
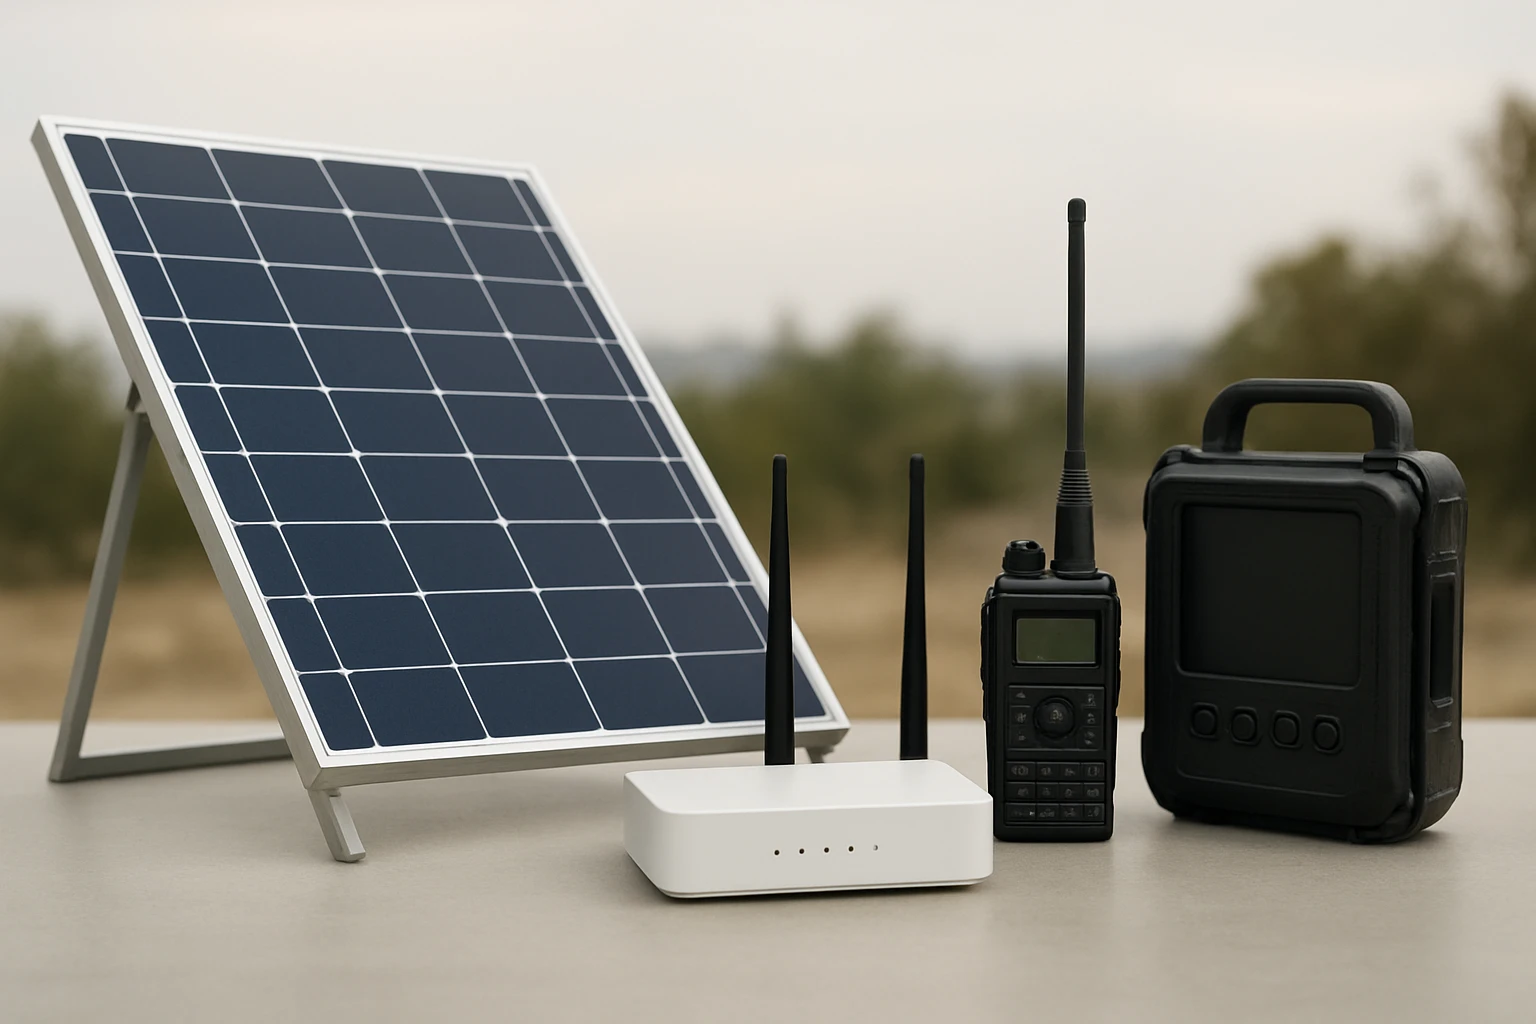
What You’ll Need
- Portable solar generation: Renogy 200W Foldable Solar Panel (price $199.00, rating 4.5/5)
- Higher‑voltage solar option for 24 V systems: Renogy 200W 24V Solar Panel (price $192.99, rating 4.7/5)
- Mesh Wi‑Fi hardware: eero 7 Mesh Wi‑Fi (price $349.99, rating 4.4/5)
- Enterprise‑grade mesh option (optional): eero Pro 7 Mesh Wi‑Fi (price $699.99, rating 5/5)
- Battery storage (portable power station compatible with MC4 input)
- MC4 to appropriate connector adapters, grounding stakes, and cable management tools
Step 1: Assess Power Requirements and Site Layout
The first major step is to calculate the total energy demand of the communication equipment. List each device, note its power draw in watts, and estimate the number of operating hours per day. For a basic emergency hub, the eero 7 consumes roughly 5 W, while a portable power station may draw 10 W for charging. Adding a satellite phone, a small radio, and a few LED lights typically brings the total to under 50 W.
Next, determine the available mounting area. A flat roof on a van, a caravan awning, or a portable ground‑mounted frame are common choices. The layout influences the angle of the solar panels, which directly affects energy capture. A 40° tilt often yields the best compromise between sunrise and sunset exposure.
With the demand estimate in hand, select the appropriate solar solution. If the system will remain at a fixed 12 V battery bank, the Renogy 200W Foldable Solar Panel provides a lightweight, portable option that folds to backpack size. Its 25 % cell efficiency ensures rapid charging even in partially cloudy conditions.
For installations that can accommodate a higher voltage architecture, the Renogy 200W 24V Solar Panel reduces current loss and improves overall system efficiency, especially in hot climates where voltage drop is a concern.
Step 2: Deploy the Solar Power Source
Begin by unpacking the chosen solar panel. The foldable model weighs only 13.89 lb and features a magnetic handle that snaps shut, simplifying transport and storage. Place the panel on the pre‑selected surface and extend the four adjustable kickstands. The 3‑angle adjustment (40°/50°/60°) allows precise alignment with the sun’s path.
Secure the panel using ground stakes or bungee cords if wind is expected. The small‑ear design and optional ground studs prevent the panel from becoming a sail in gusty conditions. Connect the MC4 cable to the power station’s solar input, ensuring polarity matches. If the power station requires a different connector (XT60, Anderson, etc.), use a high‑quality MC4 adapter; a short, thick gauge cable minimizes voltage loss.
For the 24 V panel, verify that the battery bank is configured for 24 V operation. The panel’s open‑circuit voltage (VOC) of 37.4 V and maximum power voltage (VMP) of 31.3 V are well‑suited for most 24 V charge controllers. The panel’s low temperature coefficient guarantees stable output even when ambient temperatures exceed 35 °C.
Once connected, monitor the charging indicator on the power station. The panel should deliver close to its rated 200 W under full sun, replenishing the battery bank within a few hours. This rapid recharge capability is crucial when the network must remain operational for extended periods without grid power.
Step 3: Install the Mesh Wi‑Fi System
With power secured, turn attention to the wireless backbone. The eero 7 Mesh Wi‑Fi system supports up to 120+ devices across 6,000 sq ft, making it ideal for a disaster‑response shelter. Unbox the three units, label them "Primary", "Relay 1", and "Relay 2" for easy identification.
Place the primary eero near the power station, connecting it to the station via an Ethernet cable. This wired link ensures a stable backhaul and reduces latency. The remaining two units should be positioned to maximize coverage: one in the central gathering area and another near the exterior entrance. Use the built‑in 2.5 GbE ports for any additional wired devices such as a laptop used for coordination.
Power each eero from the solar‑charged station. The eero 7 consumes minimal power, and the 200 W solar panel provides ample headroom for simultaneous charging of the station and operation of the mesh. Follow the eero mobile app’s guided setup: scan the QR code, assign a network name, and enable eero Plus for advanced security and ad‑blocking. These features protect sensitive communication data from malicious actors, a vital consideration during emergencies.
If the response team requires higher capacity or advanced guest‑network management, upgrade to the eero Pro 7 Mesh Wi‑Fi. The Pro version offers tri‑band operation, up to 600+ devices, and dual 5 GbE ports, delivering wired speeds up to 4.7 Gbps. For a large field hospital or command center, the additional bandwidth and network segmentation capabilities justify the higher cost.
Step 4: Connect Devices and Verify Network Resilience
After the mesh is online, connect all essential devices: satellite phones, two‑way radios with Wi‑Fi adapters, laptops, tablets, and any IoT sensors monitoring environmental conditions. Use the eero app to assign static IP addresses to critical equipment, ensuring reliable routing even if the network experiences temporary outages.
Perform a series of stress tests. Stream a video file from a laptop while simultaneously uploading data from a tablet. Observe signal strength on each eero unit; the app will display real‑time throughput and indicate any dead spots. If coverage gaps appear, relocate the nearest relay unit or add an additional eero (the system is easily expandable).
Document the network topology, including cable lengths, panel orientation, and battery capacity. Store this documentation in a waterproof folder inside the shelter. In the event of a component failure, responders can quickly identify the affected segment and replace it with a spare panel or eero unit.
Finally, configure automated alerts within the eero Plus dashboard. Set notifications for bandwidth saturation, device disconnects, or firmware updates. Proactive monitoring reduces downtime and keeps the communication channel open throughout the disaster response.
Tips & Pro Tips
- Always orient solar panels toward true south (or north in the southern hemisphere) for maximum daily insolation.
- Use a solar charge controller with MPPT (Maximum Power Point Tracking) to extract the highest possible power from the panels.
- When deploying the foldable panel, tighten the magnetic closure fully; a loose closure can allow dust ingress and reduce efficiency.
- Ground the panel frame with a copper rod to protect against lightning strikes in storm‑prone areas.
- Enable eero’s TrueMesh, TrueRoam, and TrueChannel features to maintain optimal routing as devices move around the shelter.
- For extended operations, consider adding a second solar panel in series to increase voltage and reduce current loss in the wiring.
- Regularly clean the panel surface with a soft, damp cloth; accumulated dust can reduce output by up to 10 %.
Troubleshooting
| Problem | Possible Cause | Solution |
|---|---|---|
| eero units show "No Internet" despite power. | Power station battery depleted. | Recharge the battery using the solar panel; verify MC4 connections are secure. |
| Intermittent Wi‑Fi dropouts. | Panel orientation causing reduced power during cloudy periods. | Re‑orient panels to capture more sunlight or add a second panel to increase capacity. |
| Devices cannot obtain IP addresses. | DHCP pool exhausted. | Increase DHCP lease range in the eero app or assign static IPs to critical devices. |
| Significant power loss over cable runs. | Undersized MC4 extension cable. | Replace with a shorter, thicker gauge cable (e.g., 10 AWG copper) as recommended in user reviews. |
Conclusion
By following this step‑by‑step guide, the reader can construct a solar‑powered mesh network that remains functional during power outages, extreme weather, or other disaster conditions. The combination of high‑efficiency Renogy solar panels and eero Wi‑Fi 7 mesh hardware provides a reliable, scalable communications platform. Proper planning, diligent installation, and routine maintenance ensure that the network will continue to serve emergency responders and affected communities when it matters most.
Investing in these tools now reduces the risk of communication failure later. The reader is encouraged to practice the setup in a controlled environment before a crisis arises, thereby gaining confidence in the system’s operation.
Products Mentioned in This Guide
Frequently Asked Questions
What components are essential for a solar‑powered mesh network in disaster response?
You need portable solar panels, a battery storage system, a Wi‑Fi 7 mesh router, and weather‑proof enclosures for the hardware.
How do I calculate the power requirements for the mesh network?
Estimate the total wattage of all devices, add a 20‑30% safety margin, and size the solar panel and battery to supply that load for the expected outage duration.
Can the system be scaled for larger shelters or mobile units?
Yes, you can add more solar panels, batteries, and mesh nodes to expand coverage and capacity without redesigning the core architecture.
What maintenance steps are needed to keep the network running during a disaster?
Regularly inspect solar panels for debris, check battery health, and verify firmware updates on the mesh routers.
Is Wi‑Fi 7 necessary, or can older Wi‑Fi standards be used?
Wi‑Fi 7 offers higher throughput and lower latency, but Wi‑Fi 6 or 5 can also work if bandwidth needs are modest.