How to Mount Portable Solar Arrays on an RV Roof: Best Mounting Options, Pros & Step‑by‑Step Installation
Introduction
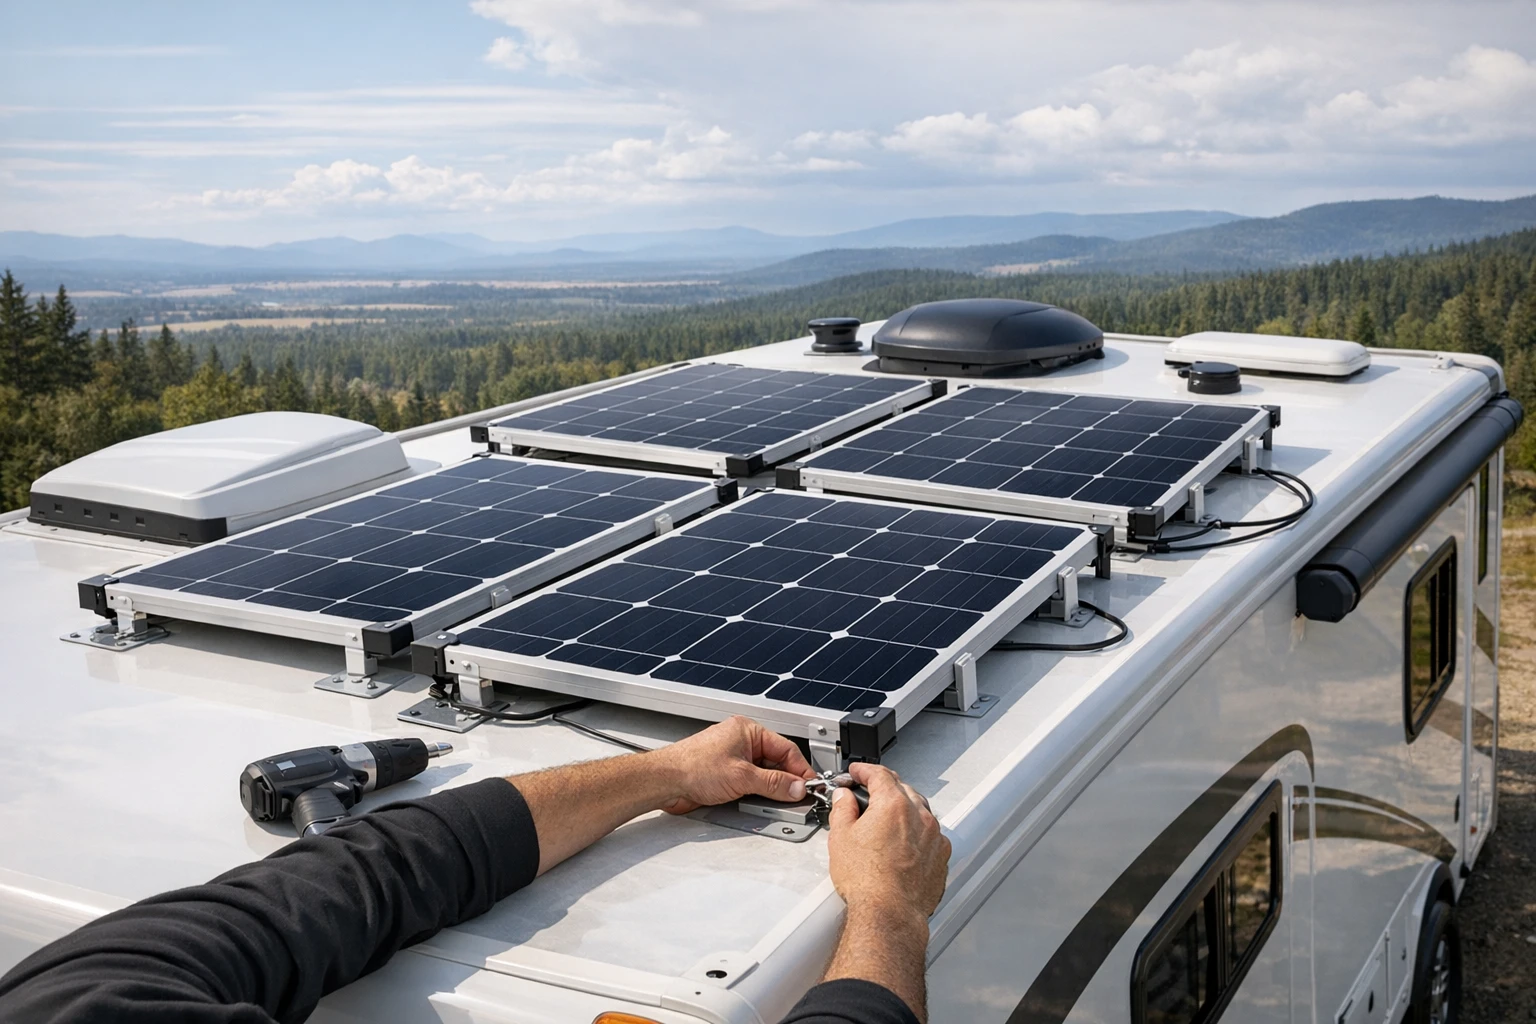
One will discover how to install portable solar arrays on an RV roof with confidence and safety. This guide explains the benefits of a well‑designed mounting system, outlines the tools required, and provides a complete step‑by‑step procedure. Readers will also receive practical tips, common‑issue troubleshooting, and a curated list of recommended products. By following the instructions, one can maximize solar energy capture while preserving the integrity of the vehicle.
What You'll Need
- Renogy Drill‑Free Roof Mount – $19.99, 4.5 stars, drill‑free corner brackets.
- Renogy Z Brackets – $10.99, 4.7 stars, lightweight aluminum brackets.
- Renogy Adjustable Tilt Brackets – $32.99, 4.3 stars, tilt‑adjustable aluminum kit.
- Karidge Adjustable RV Mounts – $51.99, 4.3 stars, 10°‑60° tilt range.
- Keopuals Solar Angle Guide – $11.99, 4.6 stars, portable angle‑finding tool.
- Silicone sealant (e.g., 3M VHB tape or Sikaflex), stainless‑steel screws, a drill with appropriate bits, a torque wrench, and a clean cloth.
Step 1 – Assess Roof Surface and Determine Layout
One should begin by inspecting the RV roof for flatness, material type, and existing mounting points. Measure the available length and width, then sketch a layout that positions the panels for optimal sun exposure, typically facing true south in the northern hemisphere. The layout determines whether a drill‑free corner bracket, a Z‑bracket, or an adjustable tilt system is most appropriate. For flat metal roofs, the Renogy Drill‑Free Roof Mount offers a leak‑free solution because it adheres without penetrating the surface.
When the roof contains pre‑drilled holes or a sturdy wooden sub‑deck, the Renogy Z Brackets provide a quick‑install option that clamps to the existing structure. If seasonal angle adjustment is desired, the Renogy Adjustable Tilt Brackets allow the user to change tilt from 0° to 28° without removing the panels. Record the exact positions of each mounting point to ensure consistent spacing during installation.
Step 2 – Prepare the Surface and Apply Adhesive
One must clean the roof surface thoroughly with isopropyl alcohol to remove dust, grease, and old sealant. After the surface is dry, apply a high‑strength 3M VHB tape or Sikaflex to the underside of the chosen brackets. The drill‑free mount relies on this adhesive bond; therefore, the tape must be pressed firmly for at least five minutes to achieve maximum adhesion. The Renogy Drill‑Free Roof Mount is constructed from UV‑resistant ABS plastic, which will not degrade under prolonged sunlight exposure, making it ideal for long‑term outdoor use.
If using the Z‑brackets or tilt brackets, one should still apply a thin bead of silicone sealant around each screw hole after drilling to prevent water ingress. The aluminum construction of the Renogy Z Brackets is lightweight yet corrosion‑free, which reduces the risk of rust on marine‑type RVs. Allow the adhesive or sealant to cure for the manufacturer‑specified time before proceeding to the next step.
Step 3 – Attach Brackets to the Roof
One should align the brackets with the previously marked positions, ensuring that the edges are flush with the roof line. For the drill‑free mount, press each corner bracket firmly until the adhesive spreads evenly, then secure the panel legs with the supplied screws. The Renogy Drill‑Free Roof Mount lifts the panel by approximately 2.3 inches, creating an air gap that improves cooling and efficiency.
When installing the Z‑brackets, use the included stainless‑steel screws and a torque wrench set to 5‑7 Nm to avoid over‑tightening. The brackets feature a unique “irregular surface” design that conforms to curved or sloped roofs, making them suitable for boats and RVs with non‑flat tops. For the adjustable tilt brackets, first attach the fixed L‑brackets to the roof, then mount the tilt L‑brackets to the panel. The tilt mechanism includes M8 plastic knob screws and wing nuts that allow precise angle adjustment without tools after installation.
Step 4 – Mount the Solar Panels
One should lift each solar panel onto the installed brackets, aligning the panel’s pre‑drilled holes with the bracket’s mounting holes. Use the supplied M6 hex cap bolts and split lock washers to secure the panel to the bracket. The Renogy Adjustable Tilt Brackets include a full hardware kit—four fixed L‑brackets, two tilt L‑brackets, and all necessary fasteners—ensuring that no additional purchases are required.
If the panel frame is thin, one may need to hold the hex nut in place with pliers while tightening the bolt, as described in user reviews. After all panels are secured, use the Keopuals Solar Angle Guide to verify the tilt angle. Place the guide on the panel, align the shadow of the black dot with the scale, and adjust until the desired angle is achieved. This simple tool eliminates guesswork and maximizes daily energy production.
Step 5 – Wire the Panels and Perform Final Checks
One must route the photovoltaic cables through the roof seal and connect them to the charge controller according to the manufacturer’s wiring diagram. Use waterproof cable glands and apply a bead of silicone sealant around each entry point to maintain a watertight seal. Verify that all connections are tight, that the panels are firmly attached, and that the tilt angles match the values indicated by the angle guide.
Finally, power on the system and monitor the charge controller for proper voltage and current readings. A well‑mounted array will show stable output without excessive heat buildup, indicating that the air gap created by the drill‑free mount or tilt brackets is functioning correctly. Record the baseline performance for future comparison after seasonal adjustments.
Tips & Pro Tips
- Always test the adhesive bond on a small area before committing to the full installation.
- When working on a sloped roof, use a ladder stabilizer and a partner to hold panels during mounting.
- Apply a thin layer of UV‑protective spray to the brackets if the RV will spend extended periods in harsh sunlight.
- For winter months, increase the tilt angle by 10°‑15° using the adjustable tilt brackets to capture the lower sun path.
- Store spare hardware (screws, nuts, washers) in a waterproof container on the RV for future maintenance.
Troubleshooting
Problem: Panels feel loose after a few weeks of travel.
Solution: Re‑torque all fasteners to the recommended 5‑7 Nm; check that the adhesive has not degraded and re‑apply sealant if necessary.
Problem: Excessive heat on the panel surface.
Solution: Verify that the drill‑free mount provides at least a 2‑inch air gap; if not, add thin spacers or switch to the tilt‑adjustable system to increase airflow.
Problem: Water leaks around bracket screws.
Solution: Remove the screws, clean the area, apply a fresh bead of silicone sealant, and reinstall using a torque wrench to avoid over‑tightening.
Conclusion
One has now learned how to assess an RV roof, select the appropriate mounting hardware, and install portable solar arrays safely and efficiently. By using high‑quality products such as the Renogy Drill‑Free Roof Mount, Renogy Z Brackets, and Renogy Adjustable Tilt Brackets, the installer can achieve a durable, leak‑free, and high‑performance solar setup. Proper preparation, precise mounting, and regular inspection will ensure reliable power generation for many journeys ahead.
Products Mentioned in This Guide
Frequently Asked Questions
What are the advantages of using Renogy’s drill‑free roof mount for portable solar panels on an RV?
It installs without drilling, preserving the roof seal, and the corner brackets provide a secure, vibration‑resistant fit.
How do Renogy Z brackets differ from standard mounting hardware?
Z brackets are lightweight aluminum pieces that create a low‑profile, slip‑resistant base, ideal for quick‑release panels.
Can I adjust the tilt of my portable solar array with Renogy’s Adjustable Tilt Brackets?
Yes, the brackets allow 0°‑45° tilt adjustment, letting you optimize sun exposure as the RV’s orientation changes.
What basic tools are required for a step‑by‑step installation of a portable solar array on an RV roof?
You’ll need a measuring tape, a marker, a screwdriver or wrench set, and optionally a torque wrench to secure the brackets to the roof rails.
How do I prevent water leaks when mounting portable solar panels on an RV roof?
Use the manufacturer’s sealant tape on all contact points and ensure the roof’s existing sealant is intact before tightening any brackets.